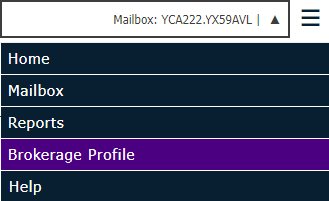
To access your account detail, from the Exchange home page click the Exchange Menu button in the top right corner and select Brokerage Profile.
The Brokerage Profile area consists of the following sections:
If required fields on any of the tabs are blank when you click Save, a message displays stating that the tabs in red are incomplete and that the fields in red on those tabs need to be filled out in order for the information to be saved.
On the Contacts tab, enter information for up to two contacts. At least one contact name must be provided.
Management system settings can only be manually updated if your brokerage is configured to manually update.
A list of users created for the current account displays, with a key icon displaying to the left of each user granted administrative rights. In this area, you can add new users, edit user information, and delete users.
The list displays five users per page by default, but you can change this selection if you prefer. Click First Page, Next Page, Previous Page, and Last Page to scroll through additional pages.
To search for users, type the user’s Full Name, Username, Phone or Email in the Find in Users field. The list refreshes automatically as you type.
To sort by any of the columns, click the column header. To sort in the reverse order, click the column header again. The header of the column currently used as a sort displays in italics with an upward arrow if sorted in ascending order and a downward arrow if sorted in descending order.
To add a user, complete the following steps:
English lowercase characters (a through z)
Numerals (0 through 9)
Symbols (such as @#$%^&-+=()!?._,~)
When a user is successfully registered::
To manage a user's profile, reset their password, or provide additional permissions, do the following:
Make any necessary changes to the User Information and Account Access frames. The Username and Email fields are not editable.
To modify the Exchange workflows to which the user has access, check each action to which the user should have access. See the Permissions section for more information on the permissions available for brokerage users and brokerage admins.
Click Save to apply your changes. (Changes take effect the next time the user logs in to the system.)
To send an email
with a password reset link to a user, click the Reset
Password button. Click Ok
on the Request Sent message.
Once the user clicks the link, the Update
Password screen displays. The user then enters a new password
and upon saving, the user receives a password confirmation email.
Note: The
password must be at least 8 characters in length, must not be the
current password or username, and must contain the following four
character groups:
English uppercase characters (A through Z)
English lowercase characters (a through z)
Numerals (0 through 9)
Symbols (such as @#$%^&-+=()!?._,~)
Please note that only user accounts created before May 19, 2024 can be deleted.
The permissions available for a user are based on their assigned role. Permissions that apply only to brokerage users and brokerage admins are documented below.
A user given the role of Brokerage User is given permission to the following workflows by default except for Files Download, which must be granted manually. Files Download was previously only available to Admin users: if you promoted Users to Admins to provide them with Files Download permission, consider demoting them to User and manually granting them Files Download.
Account Administration
API Profiles View: Allows access to view your profile contact information, and user information through the API option located in the Exchange menu if your API Profile has been enabled by Ivans.
Connections Edit: Make updates to the grid on the Connections tab on the home page.
Connections View: View the grid on the Connections tab on the home page.
Dashboard - View: View the Dashboard tab on the home page.
Feedback View: Grants viewing access to the Feedback tab on the home page.
Reports View: Grants access to Reports with rights to run the Brokerage Trading Partners report. With the viewing permission, the user can export the data from either ECS Partners or Non-ECS Partners to a CSV file.
Managing Mail
Files Download: Click a link label to download a local copy of a file in the Inbox area.
Mailbox Sessions History View: Grants access to the Sessions tab to view mailbox session history details.
Mailboxes View: Grants access to the Mailbox area (including the Mailbox Setup tab), and to multiple mailboxes (switch between mailboxes), by clicking the currently displayed mailbox and selecting a different one. Also grants access to the Go to Mailbox button on the Resend tab that displays on the Ivans Exchange Dashboard.
Modifying Agencies/Partnerships
Agency EULA View: Allows the user to view the end license user agreement.
Agency View: Grants access to Brokerage Profile with rights to manage your brokerages addresses, contacts, and management system. This permission also grants rights to view your brokerage’s users list but does not give them rights to add, edit, or delete users as those are separate permissions for Admin users.
A user given the role of Brokerage Admin is automatically granted all permissions in the system. This includes all brokerage user permissions listed above as well as the following:
Account Administration
API Clients Edit: Allows access to edit your client information through the API option located in the Exchange menu, if your API Profile has been enabled by Ivans.
API Profiles Edit: Allows access to edit your profile contact information, and user information through the API option located in the Exchange menu, if your API Profile has been enabled by Ivans.
Report Schedules Edit: Grants access to the alarm clock button on the Connections tab with rights to make edits to the scheduled reports delivery information.
Report Schedules View: Grants access to the alarm clock button on the Connections tab with rights to view the scheduled reports delivery information.
Mailbox Administration
Managing Mail
Modifying Agencies/Partnerships
Agency Edit: Make changes to the brokerage’s information, brokerages contacts, and brokerage’s download profile in Brokerage Profile.
Email Invite All Domains: This permission no longer has effect and can be disregarded.
Users Create/ Edit: Add new users using the Add button, edit existing contact information, or change a user’s password using the Edit link label located on the Users tab in Brokerage Profile.
Users Disable: Delete existing users from Ivans Exchange using the Delete link label located on the Users tab in Brokerage Profile.
Users Permissions Edit: Modify permissions granted to existing users using the Edit link label located on the Users tab in Brokerage Profile.